

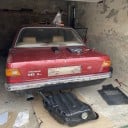
TC2 Restauration Project - A complete beginner's experience

  • If I understand correctly. I have to take off the oil filter and then ?turn? The engine if they are not upwards symetrically.

    Excuse me when I describe things not detailledly enough, but I only begin to understand that you are still learning and some details are still new to you.

    YES, the timing belt cover has to be removed! (green circle in your picture)

    First let me know if your engine is a 2.000cm³ OHC as a 1300 or 1600cm³ Engine can be damaged considerably when the timing belt is installed incorrectly and the engine is cranked !!


    If you have a 2.000cm³ engine:

    The gearbox must be in idle position. The engine is being turned then bei putting a ring spanner or ratchet on the 19mm Hex Head screw in the centre of the crank pulley.

    Never turn it anti-clockwise and / or on any other screws, e.g. on the camshaft pulley! This might damage the toothed timing belt and other parts of the engine.

    You can turn the engine a lot easier when removing the spark plugs first, but I understood that two of them seem to be seized ...


    So the "business" is to bring the engine in this position:

    If it is impossible to bring the engine into the position shown the toothed timing belt may not be installed correctly.

    Please try this and if it doesn't work we have to rectify that first ... do not start the engine then!!

    Please remove the 19mm spanner every time you do not turn your engine !!

  • It is a 2.0 engine. I never touched it but as the body had a 1.6 it has been rebuilt by the previous owner and very easily possible that it is not precise as even when the engine was running, it was not as good as it should be.


    Me taking out the dissy may have done it even worse 🫤


    Yeah, this is my first time doing anything with a car so I will need a lot of explaining. Thank you for your patience

  • Don't worry that you might have spoiled something. If it is a 2 Liter OHC it is hardly possible to destroy it.

    So please examine if the toothed timing belt sits correctly and afterwards we fix the dizzy issue ...

  • Okay so i got to it. The arrow is in the wrong position as you can see on the first photo.


    If I understood correctly the crank pulley is on the far left (3rd photo) and I turn that with a key 19 clockwise until the arrow mark is at the bottom up at the crankshaft? Or is the crank pulley the one underneath the fan (last photo)

  • In the meanwhile, something else. These 2 cables (red and black/yellow)havent been connected properly.


    The red ones were together but the small black one was just kind of hanging loosely, and it was going from the ignition coil. I wrapped the black one around the red one and did a bit of protection around it.


    Wouldnt be surprised at all if this helped the car not to turn on.

  • Gude

    On the 3rd picture is the alternator with 2 V belts. On the last picture is the Crankshaft, with two pulleys, one for the v belts with timing marks and one for the timingbelt

    Turn the crankshaft like post #31 and then take 3 pictures : camshaft pulley, crankshaft timing marks and distributor with dizzy finger on it

  • In the meanwhile, something else. These 2 cables (red and black/yellow)havent been connected properly.


    The red ones were together but the small black one was just kind of hanging loosely, and it was going from the ignition coil. I wrapped the black one around the red one and did a bit of protection around it.


    Wouldnt be surprised at all if this helped the car not to turn on.

    This is why you have to check the power on the coil with the blue tester.

  • First Picture: put the distributor cap on, and where the finger is, is the first Zylinder, cable to Zylinder 1( where the red fan is)

    Second picture: nothing to see, on the pulley ar marks and on the block is a pointer, on picture one it’s nearly to see….in the left corner.

    Third picture: okay

  • Ok, there we go ...

    For a correct ignition timing certain details have to be fulfilled ... I am sorry I have not found better photos yet, but I try to describe it a little better.


    The piston has to be in top dead centre (TDC) position AND

    Both valves have to be closed AND

    the distributor rotor has to point in the direction of the cable to the right spark plug

    AT THE SAME TIME !!

    In your photos showing the camshaft pulley the little arrow is (as you have written) not in the correct position. This could only have the following reasons:

    1. The crankshaft is not in the right position OR
    2. The timing belt is not installed correctly, damaged or the wrong type.

    First step: Turn the engine with a ring spanner or ratched clockwise on the crankshaft pulley until this pulley is in the TDC position. If you look at the front of your engine the tdc mark on the crankshaft pulley is the leftmost mark on the rim of the inner pulley.


    Here is the index on the engine block for the correct TDC position of your crankshaft.

    Would maybe a workshop manual in English help?


    Then, if the crankshaft sits correctly, check the camshaft pulley again. Where is the little arrow now?


    I think you have the correct type of timing belt because the engine once used to work correctly until it suddenly failed.


    So please check first if it is possible to turn the engine until the crankshaft pulley is on its TDC mark and at the same time the camshaft pulley arrow is exactly on its mark on the front of the cylinder head then.

    Afterwards we will take care of your dizzy ...

  • I’m off to work but hopefully I go back to the garage in the afternoon.


    So if I understand correctly, the little arrow should not be turned straight down but to the aluminium nose.


    The aluminium nose is the TDC on the marks from my photograph?


    I have the Haynes manual in english but to someone who’s doing it for the first time it might as well be in chinese 🤣🤣


    Or did I understand it wrong?


    I tried to draw it. Does the little arrow always have to be at the bottom or does it have to look at the TDC. Or is the bottom also the TDC?

  • Yes, glad my picture was clear enough ... For the beginning it is sufficient to check / adjust Step 1 and Step 2 to find out whether the timing belt sits correctly on your engine. For the rest I will give you a few more hints then ...


    Step by step, I think you will learn a lot in the next time ... :grin

  • So everything has to be exact as on the drawing. Okay I understand, thank you

    Cool! And now: set cable from Zylinder 1 on the position on your cap hows next to the distributor finger. 1 3 4 2 clockwise

  • Yes, glad my picture was clear enough ... For the beginning it is sufficient to check / adjust Step 1 and Step 2 to find out whether the timing belt sits correctly on your engine. For the rest I will give you a few more hints then ...


    Step by step, I think you will learn a lot in the next time ...

    okay so im just now at the garage. While the little arrow is proper the crankshaft is also at TDC. The distributor is at the position as shown on the photo.


    Should I take out the dissy and adjust it as the photo you put so all 3 Are in line?


    If the dissy is wrong that is probably my fault as i remember taking it out and Spinning the bottom to see how it works, without bringing it back in position

  • So you have found that your Timing Belt is ok, crankshaft and camshaft are in the right position / relation to each other, very good!

    Next step.

    Do NOT take out the dizzy yet. If you put a cap onto the dizzy is there a terminal vor a spark plug cable near the tip of its rotor?

    Then you can put the cable for cylinder #1 on this terminal and clockwise the cable for cylinder #3 on the next terminal, then (next terminal) the cable for cylinder #4 and then finally the cable for cylinder #2.

    Next step will be to loosen the clamp screw of your dizzy a bit and turn the dizzy a little until the terminal for cylinder #1 sits in the arrowed position in my picture below. Tighten the clamp screw again in a way that the dizzy can still be turned with a little "hand force" for fine adjustment.

    The engine should start now and you can fine tune your adjustment while it is warming up. Only turn the dizzy slowly and just in small angles.

    A picture comes in a minute or two ...

  • There isn’t a plug or terminal near the tip. It is between terminals 2 and 1.


    Edit: I’m Getting good spark on all 4 spark plugs.


    Edit 2: i did Jorgs test and checked the ignition coil positive with - on battery negative. Im Getting a 13.5 (Set on 200 ohms) with ignition off. If the ignition is on, there is no reading.

    2 Mal editiert, zuletzt von Zanzibar ()

  • There isn’t a plug or terminal near the tip. It is between terminals 2 and 1.


    Edit: I’m Getting good spark on all 4 spark plugs.


    Edit 2: i did Jorgs test and checked the ignition coil positive with - on battery negative. Im Getting a 13.5 (Set on 200 ohms) with ignition off. If the ignition is on, there is no reading.

    Gude

    Good job! When the spark is there, fine. @ edit 2 it was a test with the blue tester in your picture or Voltage check with multimeter on DC not ohm

  • Yes ... the distributor position needs a little fine tuning. When I look at your picture you have to loosen the clamp screw at the bottom of the dizzy and then turn the dizzy a tad counterclockwise and it should start.

  • Gude

    Good job! When the spark is there, fine. @ edit 2 it was a test with the blue tester in your picture or Voltage check with multimeter on DC not ohm

    I did it with a multimeter but ohm. I will try after work with DC. The blue tester from my photo failed to give any reading at all.

    Yes ... the distributor position needs a little fine tuning. When I look at your picture you have to loosen the clamp screw at the bottom of the dizzy and then turn the dizzy a tad counterclockwise and it should start.

    Aha. So the rotor stays in place but the distributor turns.


    Basically it should Look something like this?


    I turn the entire device a bit counterclockwise, put the cap on so that rotor is pointing on position 1. Connect the leads and pray 😁

  • Exactly, thats it!

    Keep it as arrowed, a little bit off the middle of the rotor contact tip. Watch out for the correct firing order. The dizzy rotates clockwise and starting with cyl.1 in clockwise direction the next terminal on the cap is cylinder3, then cylinder 4 and finally cylinder 2.

    Have you got your timing light yet? (If not I would not drive the car yet.)

    Another hint: The engine will probably run lumpy until you connect the rubber hose from the vacuum canister on the dizzy leading to the carburettor.

    See yellow line in picture below:

  • There has been a thread about timing lights shortly on this forum and the recommendation was posted for a certain Equus model that I use myself. As this model has an additional ignition advance setting it is a very usable device for every work around ignition timing (measuring timing, including additional advance function, dwell, tachometer, voltage) !! The Equus is more expensive than other, more basic devices but very robust and, due to the versatile features it is highly recommendable and well worth the price, because you get in fact 3 devices in one. With your electronic ignition module you will not really need the dwell feature but if you use points it is mandatoy.

    Maybe someone who recently bought it could let us know about the current price ... if you order via Voelkner it is around 110€ ... (see link above).


    User Manual